Alerting
ChaosSearch alerting capability is based on open standard Kibana tooling, allowing continuous monitoring of the ingested data for specific conditions, and send alert notifications when certain these conditions are met.
Alerts are created using 3 different components:
-
Monitor - Job that runs on a defined schedule and queries for conditions or behaviors. The results are used as input for one or more triggers. You create monitors to specify the types of conditions that you want to watch for possible alerting and notifications to take action.
-
Trigger - Criteria for generating an alert. When creating a trigger, you specify the threshold value for the field that is being monitored, and when the value of that field crosses the threshold, the monitor enters the Active state.
-
Destination - Destinations for the alerts. ChaosSearch supports Slack, Amazon Chime or any other third-party tool through custom Webhook integration.
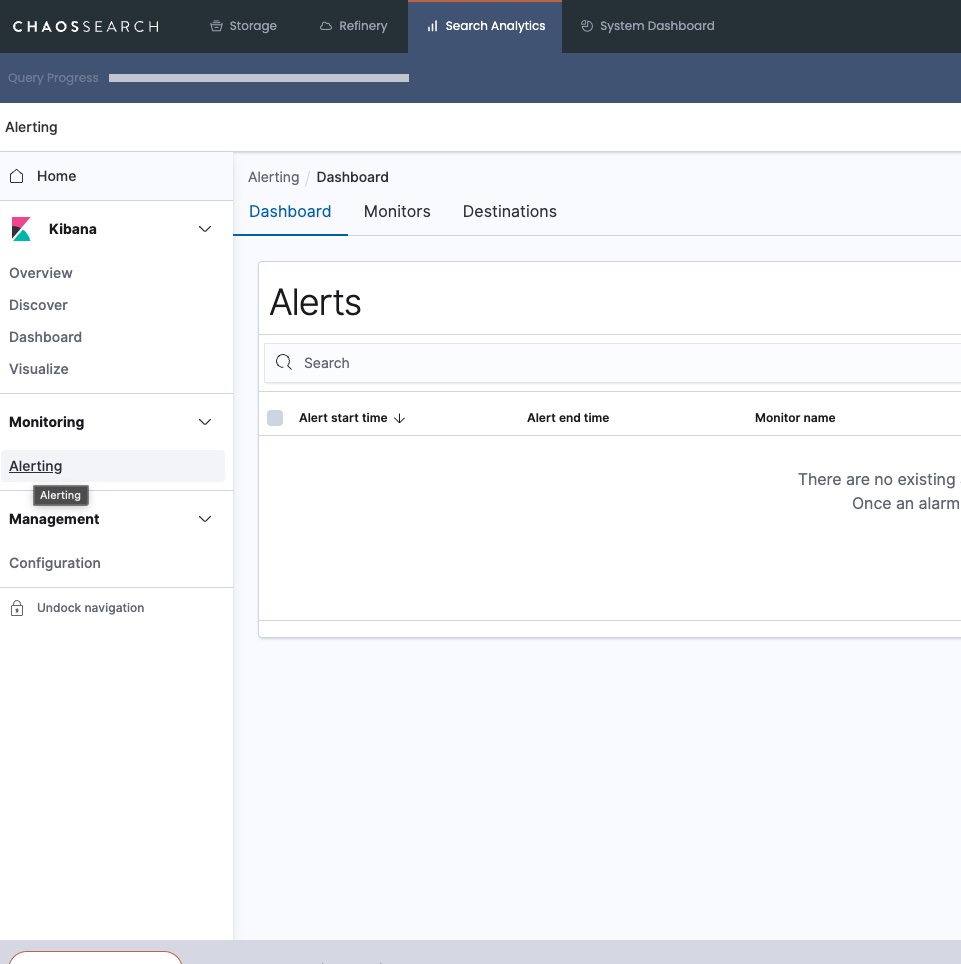
Alert configurations are accessed by selecting Alerting on the left menu, as indicated below:
On this step we will create a monitor to track ELB error logs using the filter: backend_status_codes IS NOT 200. When the error count is greater than the configured threshold, and alert will be sent.
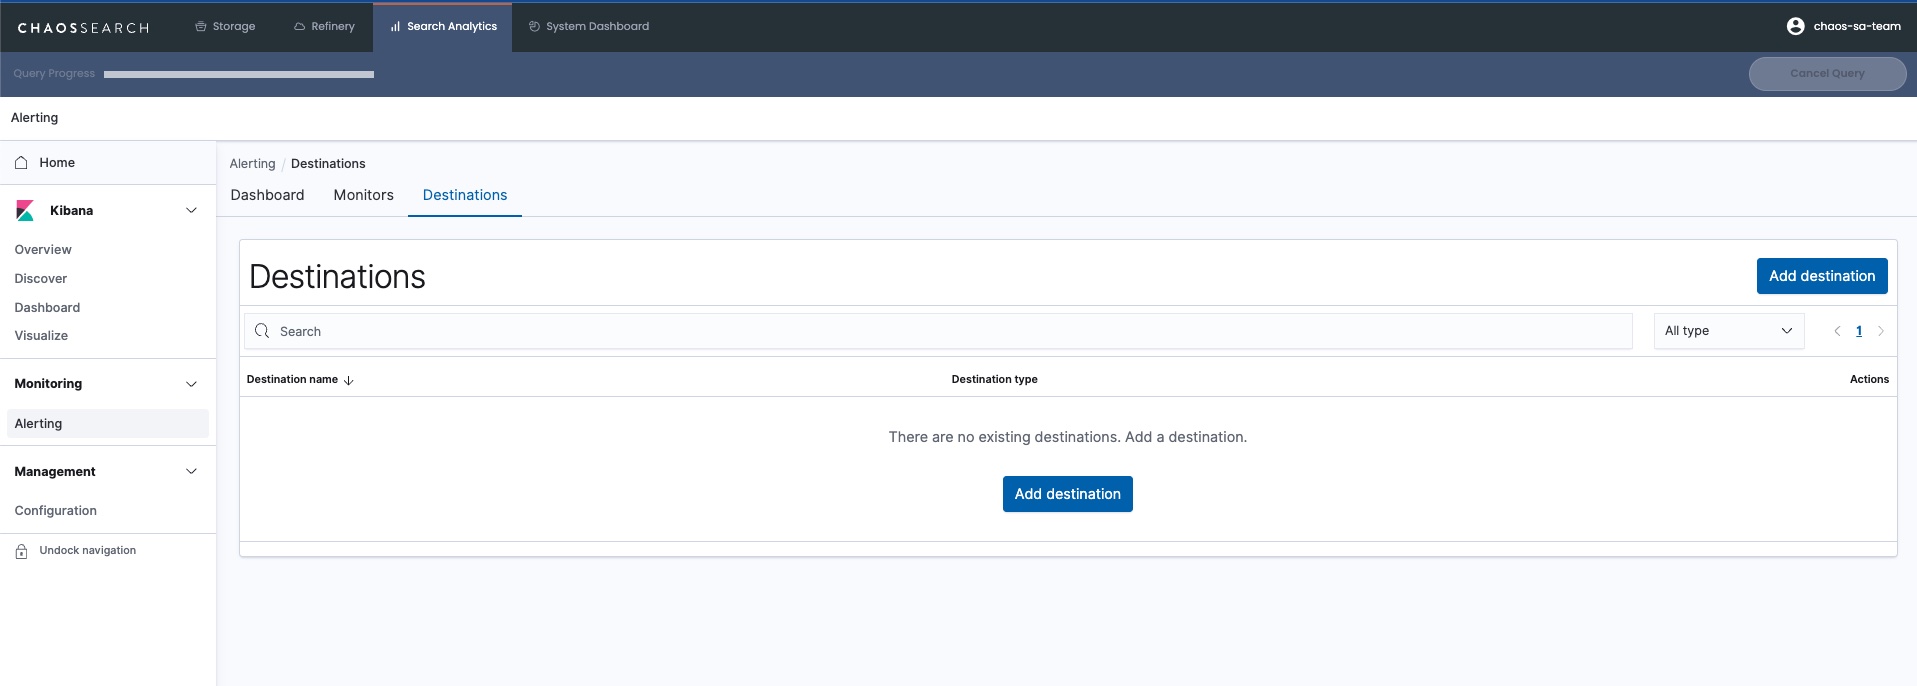
Create Destination
First step is to define a destination for the alert. Select the Destinations tab on the Alerting page, then click Add destination button.
To create a Slack destination, enter the following information:
- Name: Name for the destination
- Type: Slack
- Webhook URL: Enter the webhook for your Slack channel.
**Info: **When participating on an AWS-based live event, the webhook will be provided for the participants
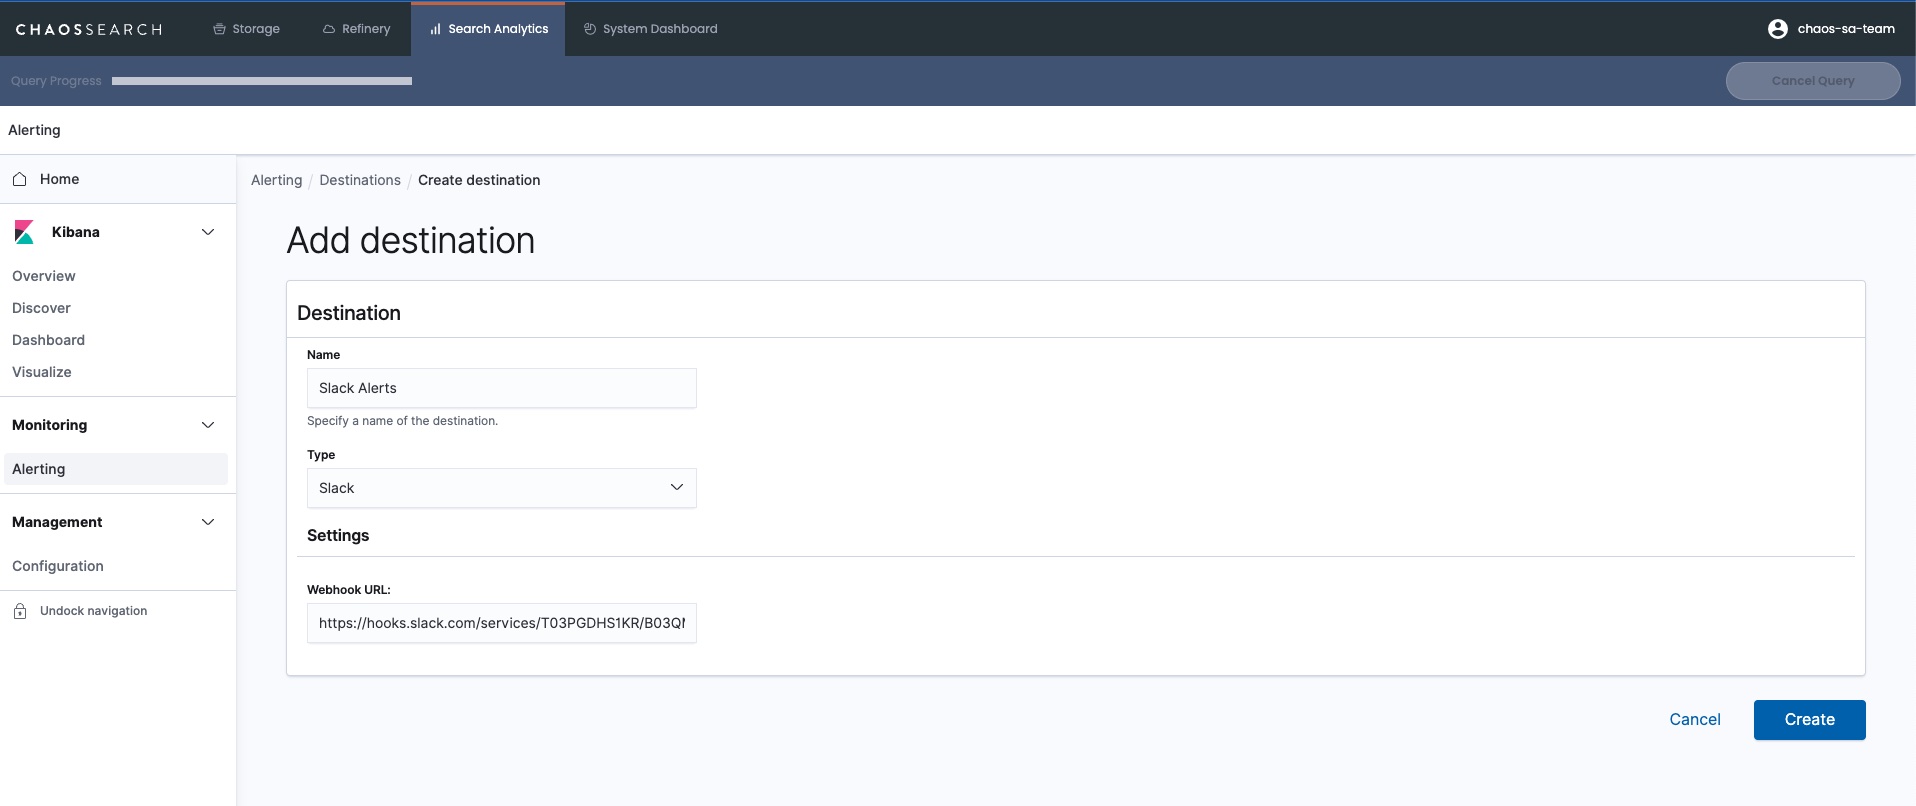
Click the Create to create the destination.
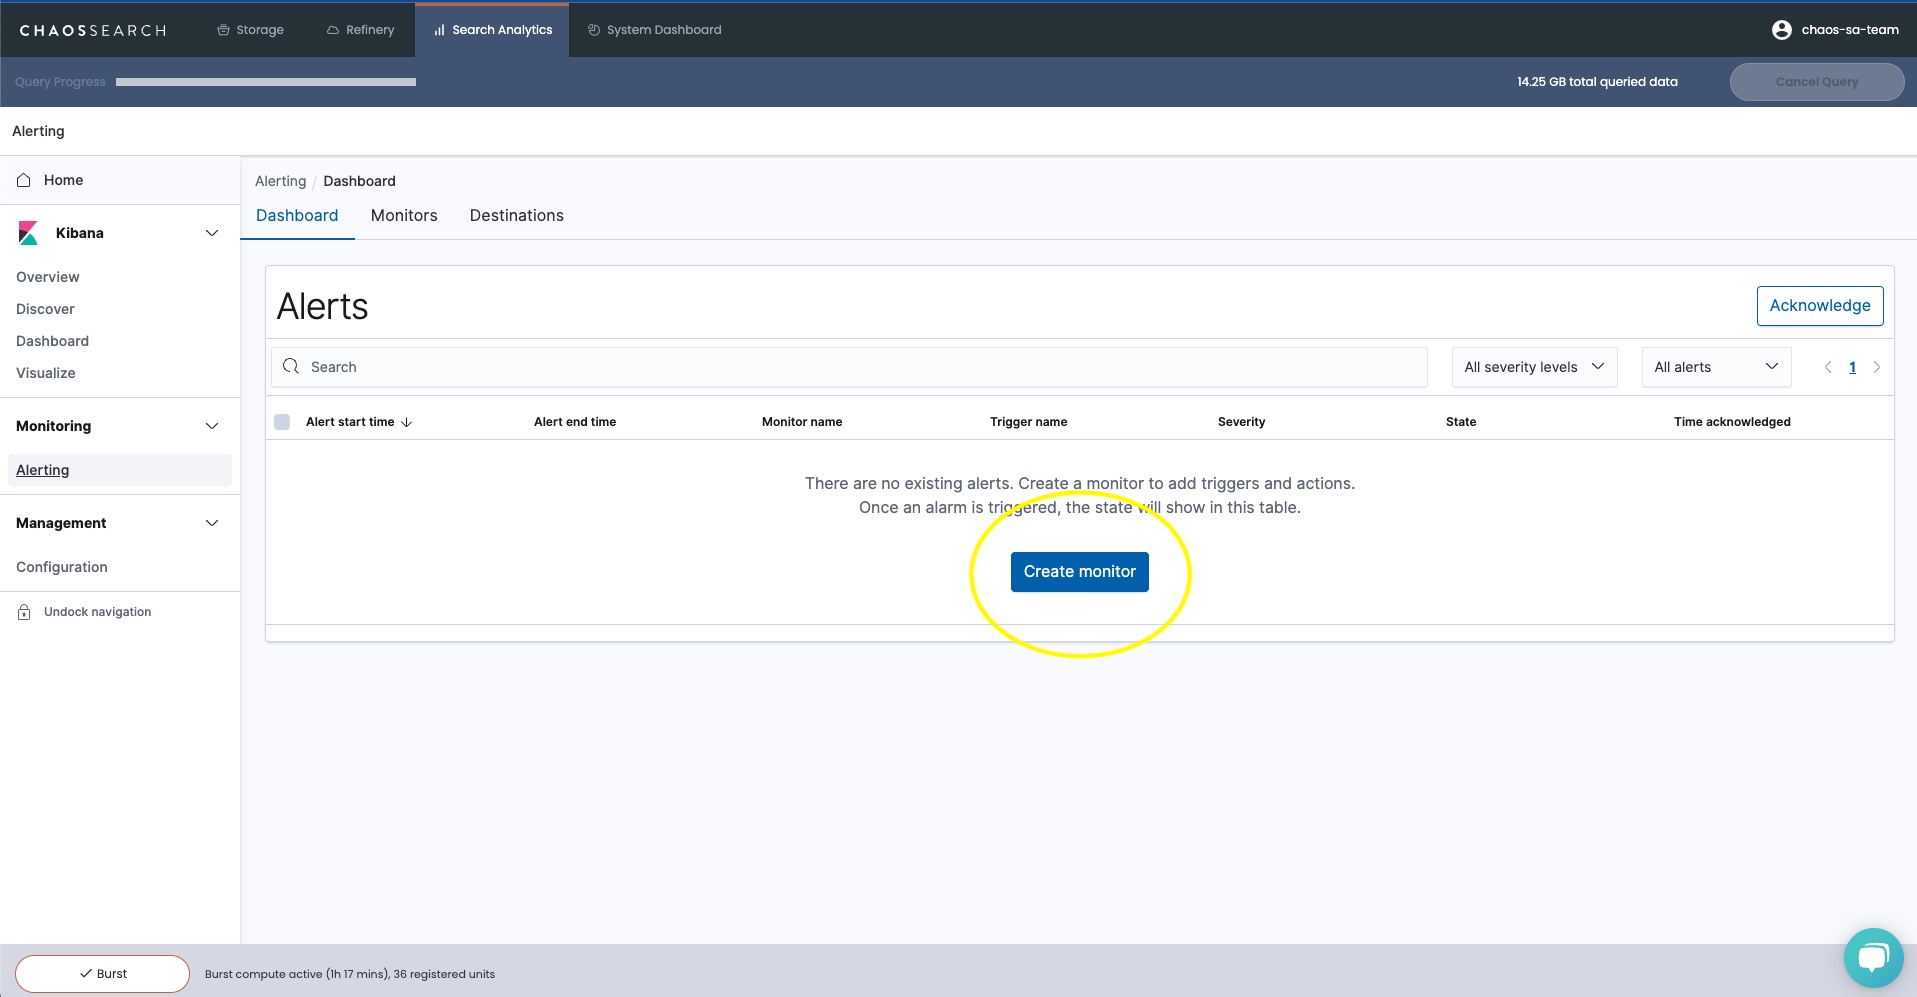
Create Monitor
Now we can create the Monitor. Select the Dashboard tab on the Alerting page, then click Create Monitor button.
Click on Create Monitor in the middle of the screen. In the Configure Monitor screen enter the following:
- Monitor Name: Name for the monitor (tip: include -monitor at the end of the name)
- Monitor State: leave unchecked to enable the monitor after creation
On the Define Monitor section, enter the following:
- How do you want to define the monitor?: Select Define using visual graph
- Index: From the dropdown menu, select the View you created in the Refinery exercise
- Timefield: From the dropdown menu, select timestamp
The graph will be populated with the historical behavior of this monitor, considering the interval and filters.
At this point your screen should look like this:
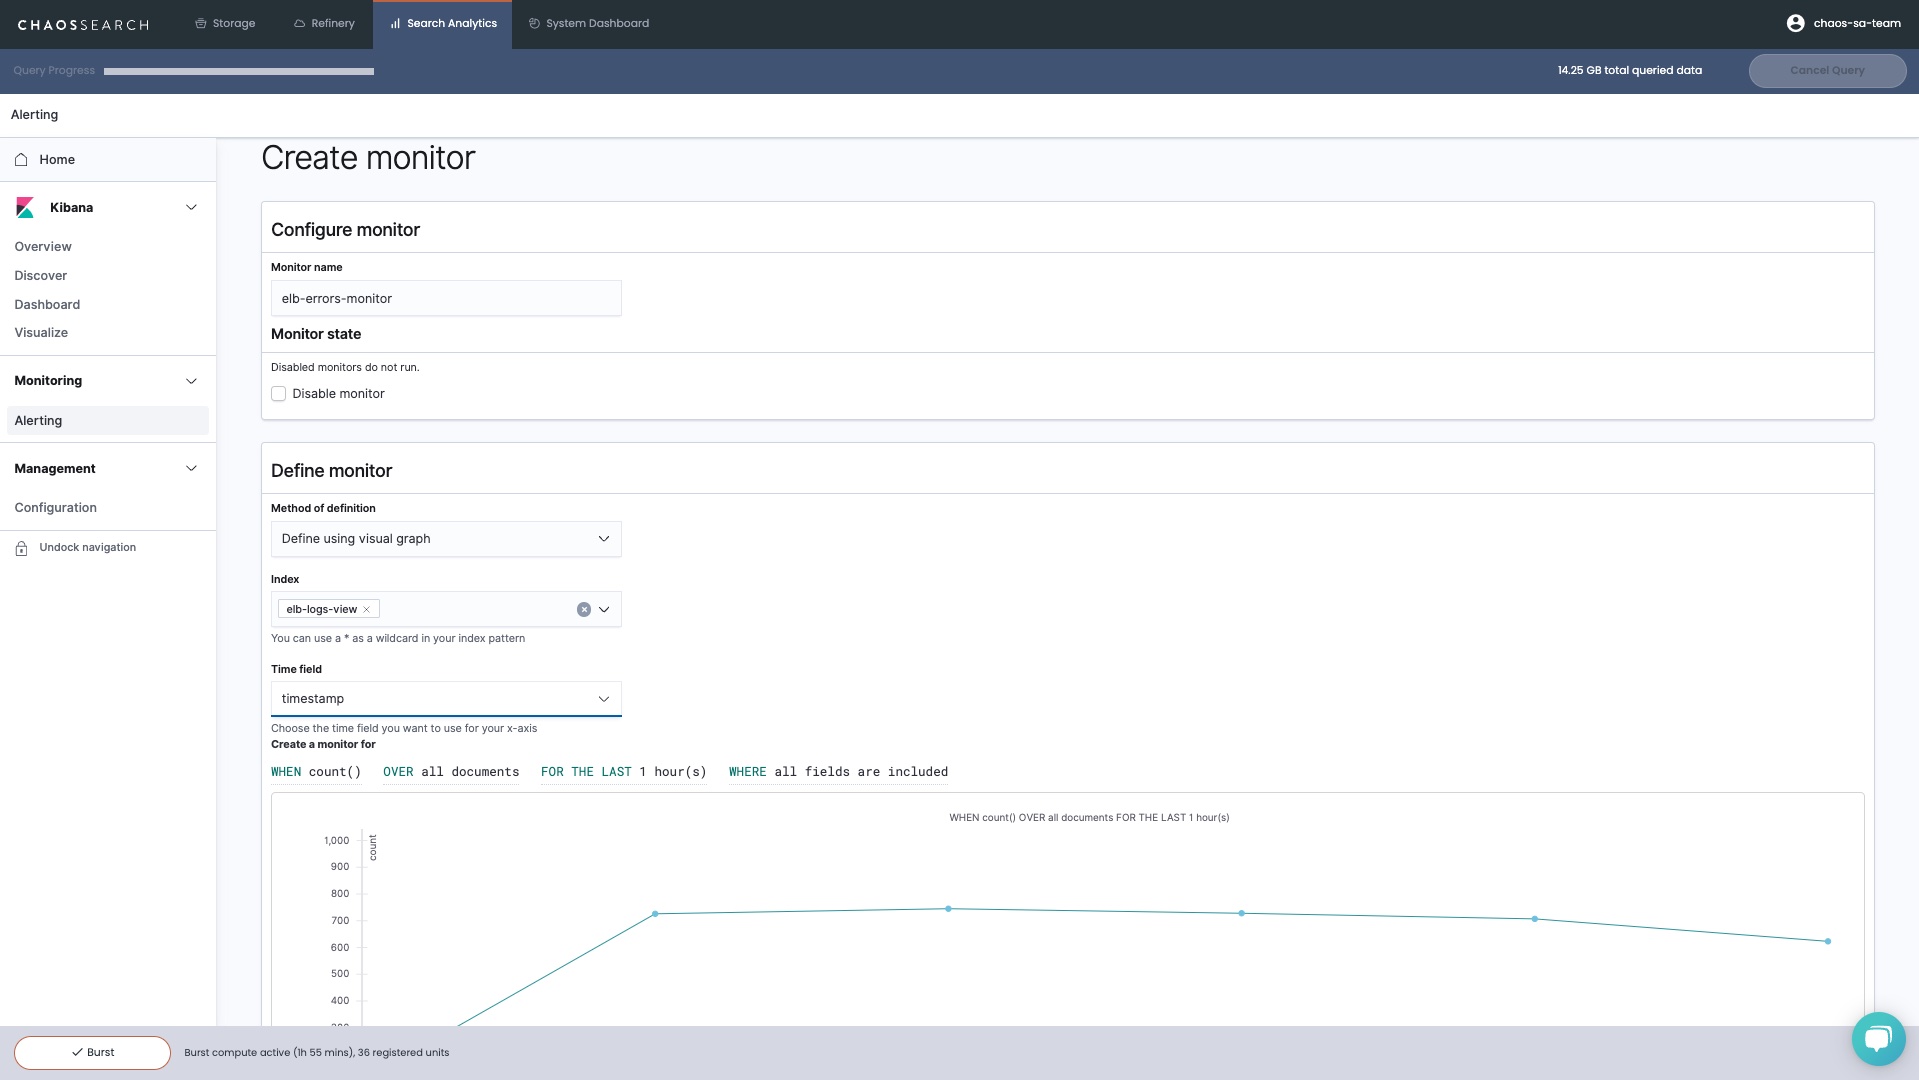
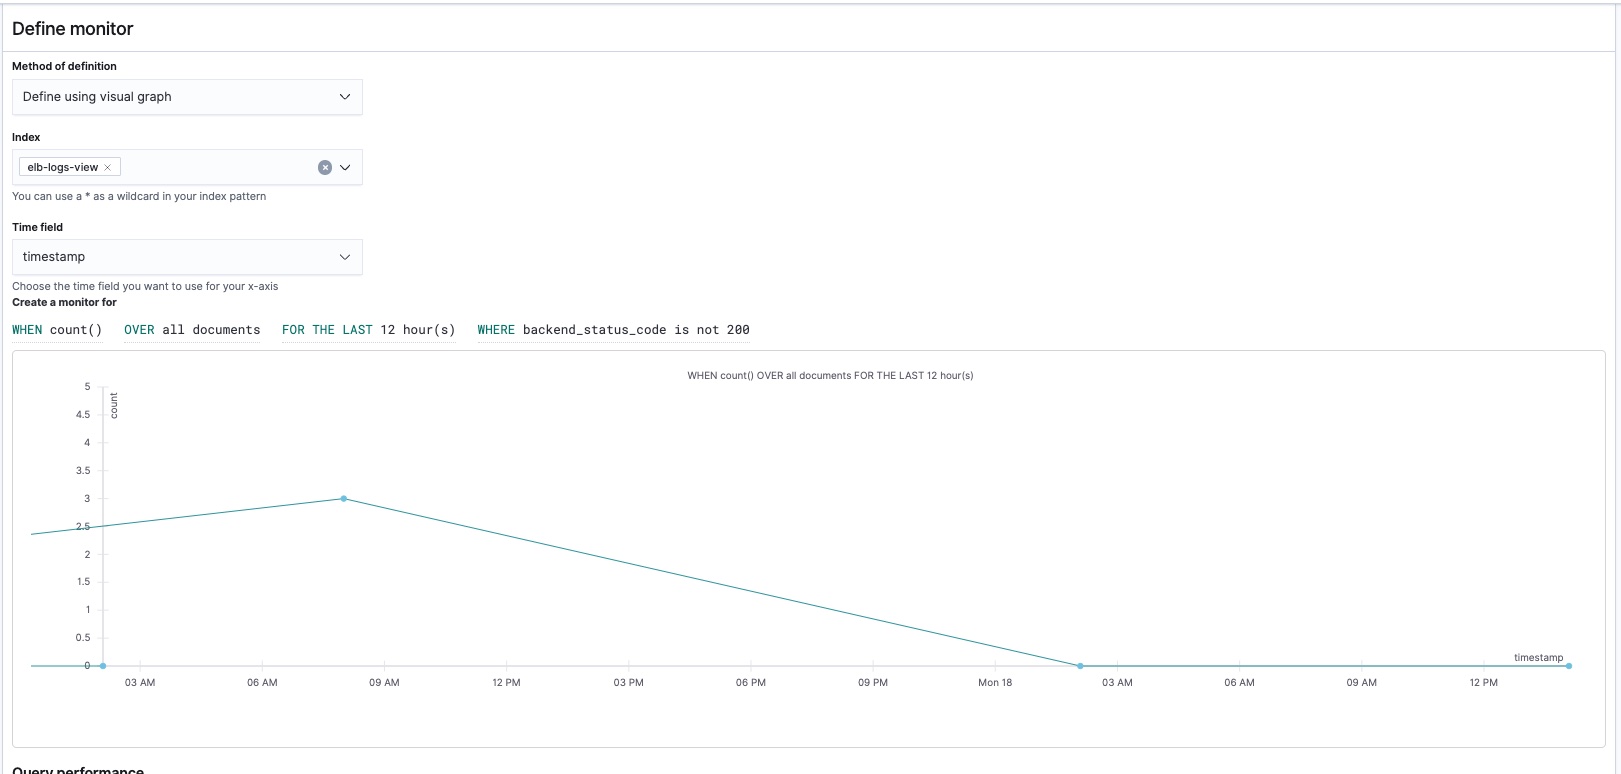
Right above the graph, there is a statement with dropdowns to set parameters for the monitor.
WHEN count() OVER all documents FOR THE LAST 1 hour(s) WHERE all fields are included
For tracking ELB backend error status codes, we can modify the statement by clicking on each section and change to the following:
WHEN count() OVER all documents FOR THE LAST 12 hour(s) WHERE backend_status_code is not 200
Scroll down to the bottom of the page, set the Monitor Schedule to run every 5 minutes, then click Create.
Create Trigger
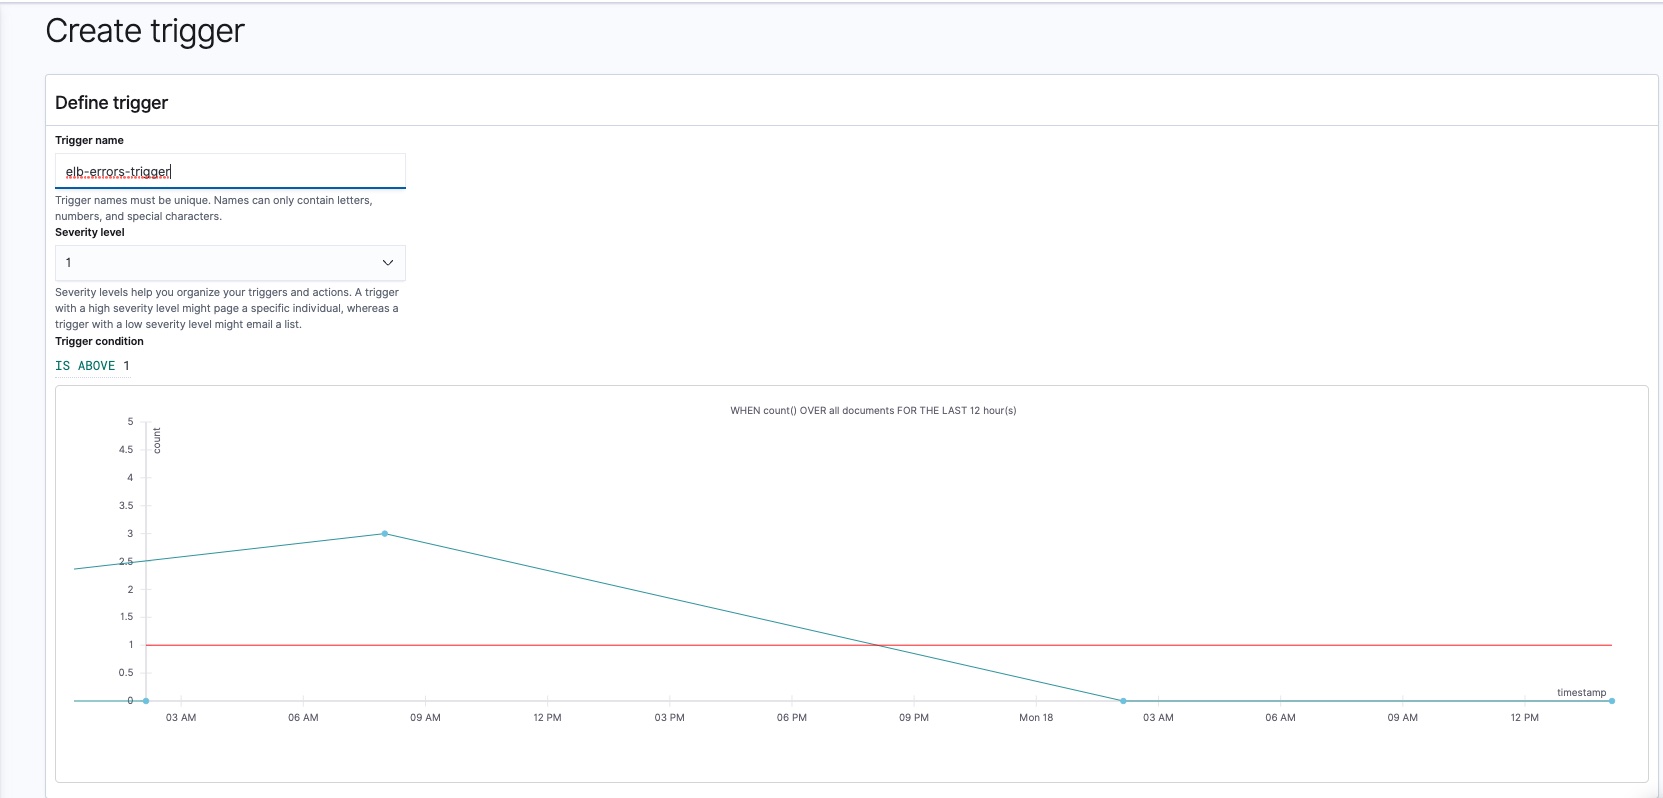
Now we need to create a Trigger. Enter the following information:
- Trigger name: Name for the trigger (tip: include -trigger at the end of the name)
- Security Level: Severy level for the alert. You can leave at 1
- Trigger Condition: Number of occurrences to trigger the alert. For this exercise, to make sure we generate alerts quickly, set the condition as following:
IS ABOVE 1
The graph shows the historical data based on the monitor configured, as well as a red line defined by the trigger threshold.
Create Action
The final step is to define an action for the trigger. We are going to use the Slack destination previously created:
- Action Name: Name for the action (tip: include -action at the end of the name)
- Destination: From the dropdown menu, select the Slack destination previously created
- Message Subject: ChaosSearch ELB Alert - Backend Errors above 1 for the past 12hrs

Scroll down and look at the Message Preview, then Select Create at the bottom right of the screen. You are brought to the screen for the alert you just created.
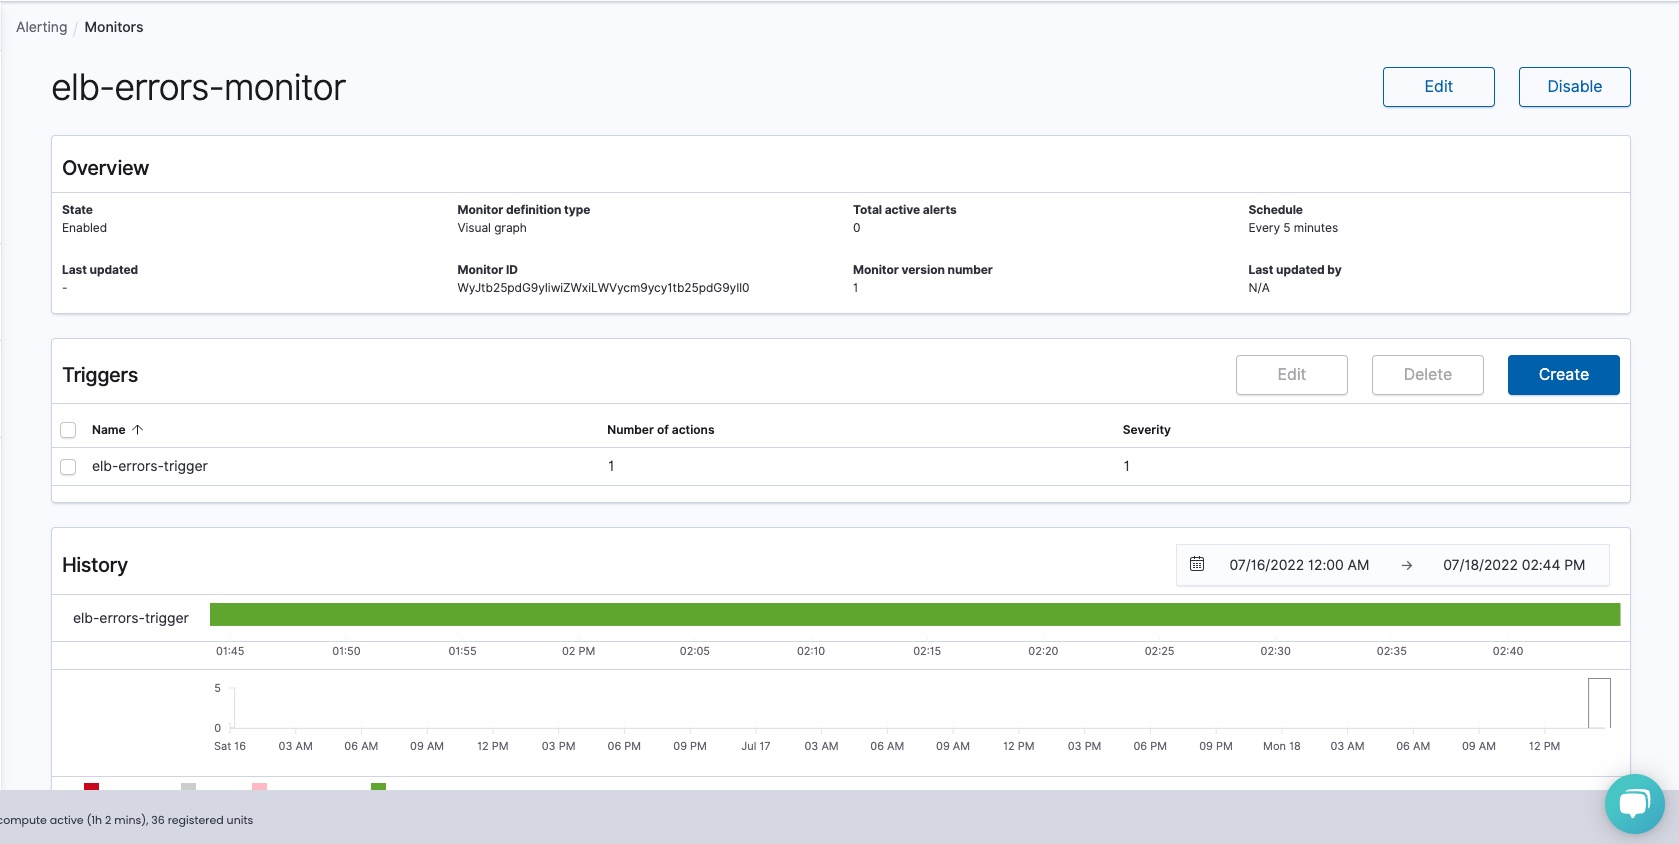
Your alert is now created and will generate notifications on Slack based on the triggering conditions configured.